Meta Description: The rules of an ergonomic desk setup for remote desk life can protect your health, sharpen your focus, and transform the way you work — here are the 10 to follow every single day.
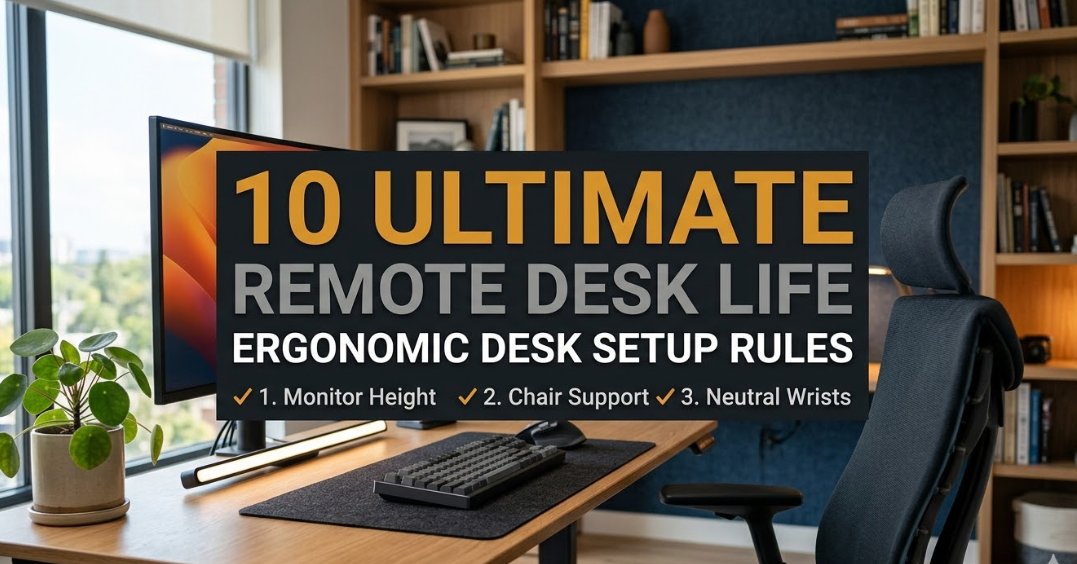
The 10 Commandments Of An Ergonomic Desk Setup For Remote Desk Life
Working from home seems like a dream. No commute, no dress code and no one swiping your lunch from the office fridge. But here’s something that most people don’t discuss: remote work can silently destroy your body if you work from the wrong desk setup.
Back pain. Neck stiffness. Wrist aches. Blurry, tired eyes. These aren’t the tiniest of annoyances — in the long run, they become real problems that drag down your productivity, your mood and, eventually, even your health.
The good news? All of it is preventable. You don’t need an expensive standing desk or a fancy ergonomic chair that costs more than your rent. You just have to know the rules — and put them into practice.
We’ve distilled the 10 ultimate remote desk life ergonomic setup rules into this guide that will transform how you work, feel and perform every day.
Why Ergonomics Actually Matters for Remote Workers
Most office workers have their setup thrust upon them. Remote workers? They piece things together — a kitchen chair here, a laptop on the bed there. That’s where the trouble starts.
Chronic low back pain, shoulder pain, and upper limb disorders are some of the common musculoskeletal disorders resulting from poor ergonomics. These injuries, according to the Bureau of Labor Statistics, make up about a third of all workplace injuries in the U.S. — and remote workers are not immune.
When you spend hours hunched over a screen, without the proper support, your body pays the price. The spine compresses. The shoulders roll forward. The neck cranes. The wrists twist at strange angles. Do this for months or years and pain becomes a permanent resident.
A deliberate ergonomic setup is not a luxury. It is a professional investment.
Rule #1 — The Height of Your Chair Comes First
Every aspect of an ergonomic setup hinges on how you sit. It all begins with your chair.
The ideal: when you are seated, your feet should lie flat on the ground (or footrest). Your knees should be at about a 90-degree angle. Your thighs are parallel to the floor, and no pressure is pushing into the back of your thighs.
How to set your chair properly
Sit all the way back in the chair so your lower back contacts the backrest. Now raise or lower the seat height until your feet are flat and your knees are level with — or slightly below — your hips. This puts less pressure on the back of your thighs and promotes a natural curve in your spine.
If your chair won’t go low enough and your feet dangle, get a footrest. A footstool, a thick book or even a small box does the trick.
Most people adjust chair height based on the desk, not their body. That’s backward. First, set the chair for your body, then adjust the desk or monitor accordingly.
Rule #2 — Place Your Monitor at the Correct Height and Distance
The position of your monitor is the single greatest cause of neck and eye strain. Most of us get this wrong in two ways: the screen is either too close, or it’s too low.
Distance: Relax back in your chair and extend out an arm. Your fingertips should only just brush the screen. That’s your optimum distance from the monitor — about 50 to 70 centimeters, or arm’s length away.
Height: The top of your screen should be at or just below eye level. When you look directly ahead, your eyes should land in the upper third of the screen. This helps to keep your neck in a neutral and forward-facing position, rather than tilted down all day.
For laptop users, there is an additional challenge
A desk with a laptop is going to have the screen too low. That means you are looking down all the time — putting an incredible strain on your neck. According to a study published in Applied Ergonomics, cervical spine load doubles with every inch of forward head tilt.
The remedy is straightforward: prop your laptop up on a stand (or a pile of books) to get the screen at eye level. You can then attach an external keyboard and mouse so you keep your arms in a comfortable position.

Rule #3 — Become an Expert at the 90-Degree Rule for Arms and Wrists
It’s important that your arms and wrists are neutral while typing or using a mouse. If they’re not, you are setting yourself up for repetitive strain injuries like carpal tunnel syndrome.
The 90-degree rule: When your hands are settled on the keyboard, elbows should be approximately 90 degrees — or slightly more open (about 100 to 110 degrees). Your forearms should be approximately parallel to the ground, or tilted barely downward.
Your wrists should be flat and straight — neither bent up nor bent down, neither twisted to the side.
Keyboard and mouse placement tips
Put your keyboard close enough so that you don’t have to reach forward for it. Extending forward even a few inches creates strain on your shoulders that builds over the course of an eight-hour day.
Your mouse must be adjacent to your keyboard, at the same height — and not pushed off to the side or back on the desk. If you have to extend your arm to get to your mouse, it’s too far away.
If you’re bending your wrists upward, consider a keyboard with a little negative tilt (sloping down away from you). Wrist rests provide benefits during breaks, but should not be used while actively typing.
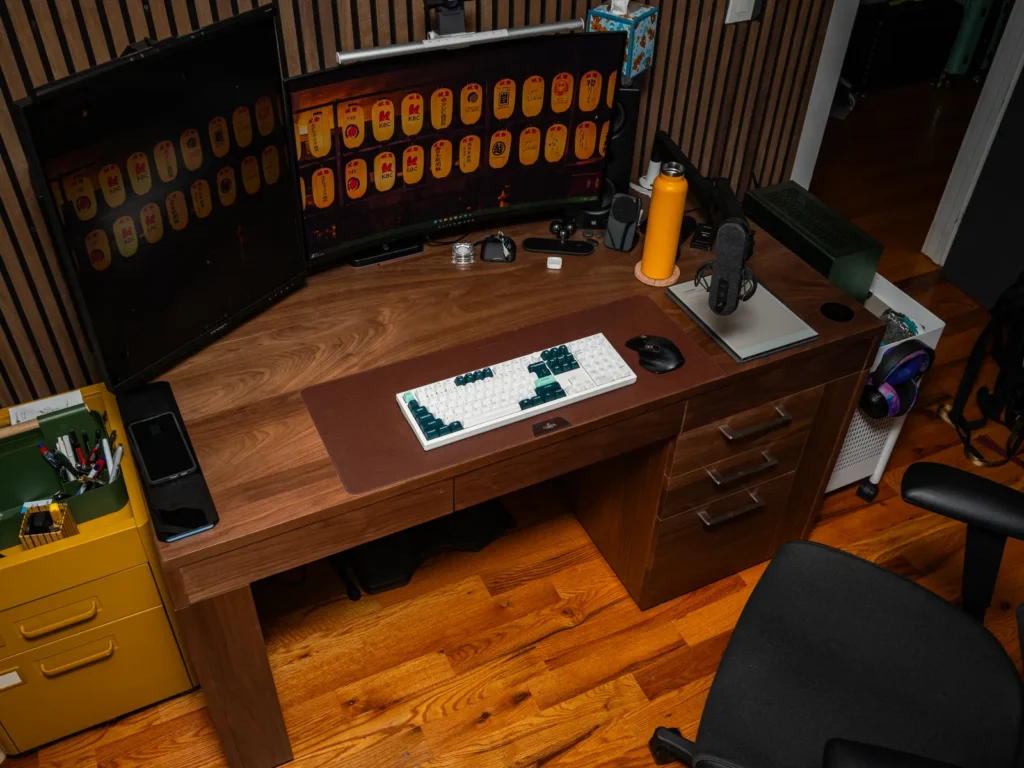
—## Rule #4 — Create Your Desk in Three Zones
Imagine your desk as a map divided into three zones depending on how frequently, and with what ease, you access things.
Zone 1 — Primary zone: Your keyboard, mouse and everything else you touch repeatedly should live here. It’s the zone right in front of you, within easy elbow reach.
Zone 2 — Secondary zone: This is where items you interact with many times a day — a phone, a notepad, your water bottle — go. It is a relaxed reach without leaning.
Zone 3 — Tertiary zone: Stuff you never frequently need. Files, reference books, backup cables. These can reside on the fringes of your desk or in drawers.
The second you have to lean, extend or twist to grab something that you use regularly, your posture is broken. That adds up quickly throughout an eight-hour workday.
Clear your desk of clutter in the primary zone. Every item that doesn’t need to be there is one more thing vying for space that should be occupied by your arms and hands.
Rule #5 — Create Lighting That Works for Your Eyes, Not Against Them
Lighting is an often overlooked component of a remote desk setup. Poor lighting results in eye strain, headaches and even chronic fatigue.
There are two lighting mistakes people often make.
Mistake one — facing a light source directly behind the screen. This creates a harsh contrast between the bright background and the screen, forcing your eyes to constantly adjust. Over time, this causes digital eye strain — also known as computer vision syndrome.
Mistake two — sitting with a window behind you. Glare reflecting off your screen from a window behind you makes it impossible to see without squinting.
The right lighting setup
Position natural light to the side of your monitor — not in front of it, not behind. In poor natural light, fill in with a desk lamp with a warm or neutral white bulb (approximately 4000K colour temperature).
If glare is a constant issue, an anti-glare screen filter can help immensely. Most people tend to ignore this and instead increase their screen brightness, which only worsens eye strain.
Rule #6 — Practice the 20-20-20 Rule Every Single Hour
Your eyes are not made to stare at a screen for hours without a break. Viewing digital screens taxes your eyesight far more than viewing physical objects, because light from screens fires directly into your eyes, causing muscle fatigue.
The 20-20-20 rule is simple and incredibly effective.
Every 20 minutes, look at something 20 feet away for 20 seconds.
That’s it. This small habit relaxes the eye muscles, relieves fatigue and can make the end-of-day headache that many remote workers experience almost completely vanish.
Going further with movement breaks
Don’t just rest your eyes — take a full body break. Every 60 minutes, stand up. Walk to the kitchen. Do a few stretches. Roll your shoulders back. Gently tilt your head from side to side.
Those micro-breaks won’t hurt your productivity. Research consistently shows they boost focus, relieve fatigue and allow you to return to work sharper than if you’d pushed on without stopping.
Rule #7 — Get Your Chair’s Lumbar Support Just Right
Lower back pain is the number one health complaint among remote workers, with the absence of lumbar support typically to blame.
The lower back (lumbar region) has a natural inward curve. When you sit for extended periods, especially on a flat chair or soft couch, that curve flattens out. The muscles in your lower back have to work overtime just to hold you up, and they get sore and inflamed.
How to improve your lumbar support
The lumbar support in your chair should gently press against the natural curve of your lower back — about the area just above where a belt would hit you. It should not propel you forward, and it should not vanish into a gap when you sit back fully.
If your chair lacks built-in lumbar support, or the existing support isn’t adjustable enough for you, a lumbar cushion is an ideal and budget-friendly solution. A rolled-up towel placed at your lower back also helps surprisingly well.
Sit all the way back in your chair — not perched on the edge. Sitting on the edge of your seat removes all back support, which is one of the fastest ways to develop lower back pain.
—## Rule #8 — Consider Cable Management a Matter of Health, Not Just Tidiness
A desk buried in tangled cables is more than an eyesore. It’s actually a safety and ergonomic hazard.
Desk cables consume your main work area, pushing your keyboard, mouse and other items further away than they should be. Cables that drape down and get caught on your legs can jerk devices off the desk or create tripping hazards. And research has shown that a visually cluttered desk leads to more mental stress and less focus.
Simple cable management solutions
- Cable clips or adhesive cable holders can guide cords along the back edge of your desk or down the desk legs.
- A cable management tray under the desk is one of the best investments you can make for under $15.
- If you work wirelessly with a Bluetooth keyboard and mouse, you automatically eliminate most desktop cable clutter.
- Label power strips and adapter bricks so you know what’s plugged in, and group them outside your immediate reach zone.
A clean desk is not just about aesthetics. It actively promotes good ergonomics by keeping your primary zone open and your arm movements unhindered.
Rule #9 — Use a Standing Desk or a Standing Routine Daily
Sitting more than six to eight hours a day has been associated with increased risk of cardiovascular disease, metabolic problems and premature death — even among those who exercise regularly. The saying “sitting is the new smoking” gets plenty of use, but the science behind it is real.
You don’t need to be on your feet all day. In fact, standing all day has its own set of issues. The idea is alternation — moving between sitting and standing throughout the day.
According to research published by the British Journal of Sports Medicine, office workers should aim to accumulate at least two hours of standing and light activity during the working day, building up to four hours over time.
How to build a standing routine without a fancy desk
A sit-stand desk is the simplest solution, if the budget permits. Plenty of models are now available at budget-friendly price points that can make a huge difference. But if you don’t have one, there are alternatives.
- A raised surface, such as a kitchen counter or a high shelf, can act as an impromptu standing station.
- A pile of heavy books or a monitor riser can temporarily lift your setup to standing height.
- Schedule standing tasks: take phone calls standing, read documents on a printed page while standing, and turn video calls that don’t require heavy typing into standing meetings.
Aim for at least 30 minutes of standing per 90 minutes of sitting. Your circulation, your energy levels, and your spine will all thank you.
Rule #10 — Set Your Setup Up for Your Body, Not Someone Else’s
The number one mistake people make with ergonomics is replicating somebody else’s setup precisely. Ergonomics is not one-size-fits-all. The ideal setup for a 5’10” person is all wrong for a 5’3″ person.
Your proportions, your vision, your particular pain points — all of these determine what the right setup looks like for you.
Design your setup around these personal factors
Your height: Taller individuals require higher desks and monitor stands. Shorter people tend to require footrests and lower chair settings.
Your vision: When you wear glasses, your monitor distance may differ depending on your prescription. If you wear bifocals, your monitor may need to be slightly lower so you are not tilting your neck to look through the bottom of the lens.
Your existing pain points: If you already have wrist problems, invest more in keyboard ergonomics. If lower back pain is your trouble, focus on lumbar support and standing time.
Your work style: Designers and creative professionals who use a stylus or drawing tablet need different arm positioning than programmers who live on the keyboard. Video editors who work with multiple monitors have their own monitor placement considerations.
Perform a five-minute self-evaluation every few months. Sit at your desk in your natural posture, close your eyes and pay attention to where tension shows up in your body. That guidance is more valuable than any boilerplate instructions — including this one.
Quick Reference: The 10 Rules at a Glance
| # | Rule | Key Action |
|---|---|---|
| 1 | Chair height | Feet flat on floor, knees at 90° |
| 2 | Monitor distance & height | Top at eye level, arm’s length away |
| 3 | Wrist & arm position | Elbows at 90°, wrists neutral and flat |
| 4 | Desk zone layout | Primary zone clear and within reach |
| 5 | Lighting | Light to the side, no glare on screen |
| 6 | 20-20-20 rule | Every 20 min, look 20 ft away for 20 sec |
| 7 | Lumbar support | Support the natural lower back curve |
| 8 | Cable management | Cords routed, workspace clear |
| 9 | Stand & move | Alternate sitting and standing every 90 min |
| 10 | Personalize | Adjust everything for your own body |
Bringing It All Together: Your Ergonomic Setup Checklist
Before you sit down tomorrow morning, go through this list.
- Chair adjusted with feet flat and knees at 90°
- Top of monitor at or just below eye level
- Monitor at arm’s length distance
- Keyboard close, elbows at 90°, wrists flat
- Mouse positioned right next to the keyboard at the same height
- A source of natural light to the side of your monitor (not behind or in front)
- Desk lamp with a neutral white bulb for darker hours
- Primary desk zone clear of clutter
- Cables routed and managed
- Lumbar support in place and making contact with your lower back
- Standing routine or sit-stand schedule planned for the day
- 20-20-20 reminder set on your phone or computer
You don’t have to get it all done on day one. Choose two or three changes to implement this week, then add more next week. Small steps compound over time into a truly healthy work environment.
How to Know Whether Your Setup Is Working
After a few ergonomic adjustments, it does take your body time to adapt. In fact, you may feel a little more fatigued or achy in the first few days as your muscles adjust to a healthier position — that’s normal.
After a week or two of regular use, look for these signs that your setup is doing its job:
- Decreased stiffness in the lower back throughout the day
- Fewer headaches or eye strain episodes
- Less shoulder and neck tension at the end of the workday
- Less of a 3 p.m. energy crash, more energy in the afternoon
- Greater focus and momentum during long work sessions
If you’re still experiencing pain after making adjustments, consider talking with an occupational therapist or ergonomics specialist. Sometimes it takes a small tweak from an expert eye to fix something that hours of self-adjustment couldn’t.
FAQs: Remote Desk Life Ergonomic Desk Setup
Q: How much should I invest in an ergonomic desk setup? You don’t have to break the bank. A good adjustable chair ($150–$400), a monitor stand or arm ($30–$80) and a footrest if needed ($20–$40) can upgrade your setup for less than $500. Many high-impact fixes — such as adjusting your chair height, repositioning your monitor and decluttering your desk — cost nothing at all.
Q: Is a standing desk really worth the money? Your chances of avoiding injury are higher if you sit more than six hours a day. You don’t need a motorized desk — a simple tabletop riser that costs a fraction of the price works well. The real benefit isn’t standing itself; it’s alternating postures throughout the course of your day.
Q: My chair doesn’t have lumbar support. What can I do? A lumbar pillow or even a rolled-up bath towel placed at your lower back works very well. Position it so that it supports the natural inward curve of your spine, just above your hips.
Q: What’s the right way to set up ergonomics if I’m working on a laptop only? When the laptop is flat on a desk, the screen is too low. Pop it up on a stand or books, then plug in an external keyboard and mouse. This one change eliminates the most common cause of neck and wrist pain for laptop users.
Q: Can ergonomics really impact my productivity? Absolutely. According to research by the Human Factors and Ergonomics Research Group at Cornell University, productivity can increase by up to 25% through ergonomic improvements. Pain is distracting. Fatigue is distracting. Eliminate those, and your natural ability to focus improves.
Q: How frequently should I reassess my ergonomic setup? Every six months is a good baseline. Also reassess whenever you switch desks, chairs or monitors, or a new pain point emerges. Your body changes over time — your setup should too.
Q: Which ergonomic rule should beginners start with? Start with your chair height. Everything else — monitor position, keyboard placement, arm angle — relies on where your body is in relation to the desk. Get the chair right and you have a foundation to build everything else on.
The Bigger Picture: Remote Desk Life Is a Long Game
Remote work is no longer an experiment. For millions of people around the world, it is a permanent reality. The decisions you make about your workspace today will compound — for better or worse — for years to come.
A bad setup for a few weeks is uncomfortable. A bad setup for five years can cause lasting damage that follows you long after remote work ends.
The 10 commandments of an ergonomic desk setup for remote desk life are not complex. They don’t require a huge budget or a perfect space. They require attention, a dose of patience, and an acknowledgment that how you sit influences how you live.
Start with one rule today. Make it automatic. Then add another.
Your future self — the one without chronic back pain, the one who still has energy at 6 p.m., the one who can work comfortably for decades — will be glad you started now.
Enjoyed this guide? Send it to a remote worker you know who could use a better setup.