Meta Description: Remote desk life hacks that are proven effective — 9 real examples of home office reconstructions from A to Z, including ergonomics, lighting, cable management and productivity tools.
I Used 9 Desk Life Setup Ideas to Boost My Remote Tech Productivity in My Home Office
My first “home office” was a kitchen chair and a laptop on top of some books. Sound familiar?
Over the past few years I tested, fiddled with and redesigned my workspace — not once, not twice but a complete nine times. I learned something new about how to make a remote desk life setup work with each iteration.
This article analyzes every single idea I attempted — what did and didn’t work, and how I’d approach them differently. Whether you find yourself squeezed into a small bedroom or fortunate to have a space specifically for work or study, there’s something here for you.
Because Your Home Office Setup Does Matter
Here’s something no one tells you when you go remote: your environment shapes your output more than you realize.
Bad lighting gives you headaches. A rubbish chair wrecks your back. Tangled cables kill your focus before you even open your first tab.
A good life at your remote desk isn’t about buying thousands of dollars worth of fancy gear. It’s about simple, smart decisions that accumulate.
Let’s get into it.
Setup Idea #1: The Standing Desk Conversion
Moving More, From Sitting All Day
The first major upgrade I made was transitioning from a fixed desk to a sit-stand setup.
I didn’t immediately run out to buy an expensive motorized desk, either. I began with a $35 desktop riser that mounted on my existing desk. It was simple, cheap, and it changed everything.
Standing for 20–30 minutes every hour made a big difference. My lower back stopped aching. My post-lunch energy dips were less punishing.
Insights I Gleaned About Standing Desks
You don’t have to stand all day. That’s also bad for you, though. The idea is to switch back and forth — sit, stand, sit, stand.
A decent anti-fatigue mat is non-negotiable. Your feet and knees hurt quickly when standing on a hard floor.
Recommended: Get a budget riser first instead of investing straight into a motorized desk. If you love it after 30 days — upgrade.
| Option | Cost | Pros | Cons |
|---|---|---|---|
| Desktop riser | $30–$80 | Inexpensive, portable | Limited height range |
| Manual crank desk | $150–$300 | Sturdy, no electricity | Slow to adjust |
| Motorized desk | $350–$800 | Fast, programmable | Expensive |
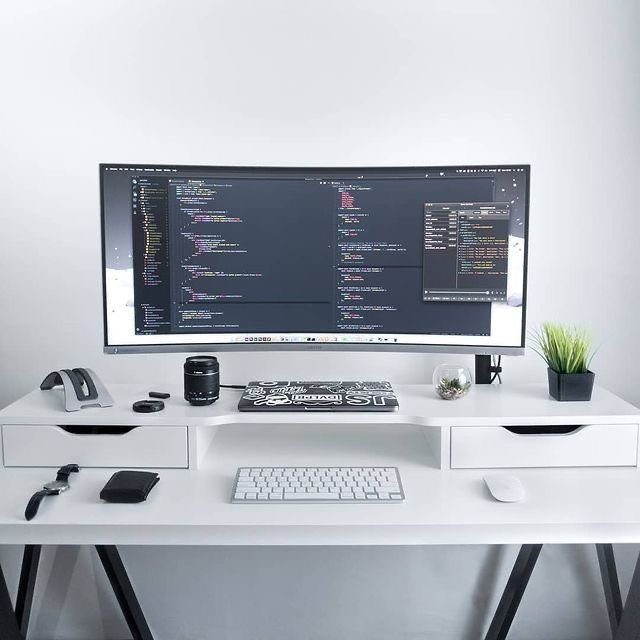
Setup Idea #2: Two Monitors Mounted on the Wall
The Screen Space Game-Changer
My second experiment was going dual monitor.
I had a spare monitor languishing in a closet. I attached a dual arm clamp mount to the edge of my desk and mounted both screens on it. Gone were the days of monitor stands eating up desk space.
The change in workflow was immediate. On the left screen, I kept my main tasks. On the right, reference materials — emails, docs, Slack.
How to Get the Angles Right
Eye level matters a lot here. The tops of your screens should sit roughly at eye level when you’re sitting upright. Constantly looking up or down strains your neck.
For dual monitors, tilt each screen approximately 15–20 degrees inward so your eyes aren’t struggling to focus.
A Note on Monitor Sizes
If you have two screens of different sizes, it can feel awkward to work across them. If possible, match your monitors, or at least match their resolution and refresh rate.
Setup Idea #3: The Bias Lighting + Task Light Combo
Stop Working in Harsh Light
This was one of the cheapest upgrades with one of the largest returns.
I added two things:
Bias lighting — a strip of LED lights behind my monitor. It lowers the contrast between a bright screen and a dark wall, which significantly reduces eye strain.
A desk lamp with adjustable color temperature — for when I need focused light on my physical notebook or keyboard without blasting my eyes.
How Lighting Gets Overlooked Far Too Often
Most remote workers complain about headaches and tired eyes but never think to check their lighting. The default overhead ceiling light is often too harsh, too yellow, or aimed in a way that creates glare on your screen.
A neutral white bulb around 4,000K is a great starting point for a home office. It’s bright without being clinical.
Setup Idea #4: Cable Management Overhaul
The Chaos That Was Hiding Under My Desk
Before this upgrade, I had 14 cables running across my desk and floor. I’m not exaggerating.
I spent one afternoon sorting everything using:
- Sticky-back cable clips for the back edge of the desk
- Velcro cable ties to bundle cords together
- A small cable management box to hide the power strip and excess cable length
- Spiral cable wrap for grouping cables running together
The result looked completely different. The desk felt bigger. My brain felt clearer.
Why Visual Clutter Kills Focus
There’s real research behind this. Clutter in your visual field competes for your attention — even subconsciously. A clean desk tells your brain it’s time to work.
This is one of the easiest and cheapest improvements you can make to your remote desk life setup. Spend $15 and a Saturday afternoon, and you’ll wonder why it took you so long. For more ideas on building a cleaner, more productive workspace, check out Remote Desk Life — a dedicated resource for home office setups and remote work tips.
Setup Idea #5: Replacing My Chair With an Ergonomic One
The Upgrade I Waited Too Long to Make
I held out on paying for a good chair for nearly 12 months. “My back’s not that bad,” I told myself.
Then I started developing tension headaches and a persistent ache in my left shoulder.
After much deliberation, I purchased a mid-range ergonomic chair with adjustable lumbar support, adjustable armrests, and seat depth control. Within a week, the headaches had disappeared.
What to Look for in an Ergonomic Chair
You don’t have to spend big money on a Herman Miller (though they are wonderful). A solid ergonomic chair in the $200–$400 range can do the job if it has:
- Adjustable lumbar support
- Seat height and depth adjustment
- Armrests that move up/down and in/out
- Breathable mesh back
Quick posture check: Feet flat on the floor, knees at 90 degrees, lower back supported, elbows at desk height, eyes level with the top of your screen.
Setup Idea #6: Building a Pegboard Wall Organizer
Turning Dead Wall Space Into Working Storage
My desk was always cluttered with small things — headphones, pens, sticky notes, charging cables, scissors. I mounted a 24″x18″ pegboard on the wall directly in front of my desk.
With a set of hooks, small bins, and a shelf attachment, I now have:
- Headphones hanging at arm’s reach
- A charging station for my phone and earbuds
- A small shelf for a plant and a speaker
- A paper holder for notes
Why Pegboards Work So Well in Home Offices
They’re modular. You can rearrange hooks and accessories at any time without drilling new holes. They’re inexpensive — IKEA’s SKÅDIS is a popular favourite. And they use vertical space rather than desk space.
If your home office is small, going vertical is the most effective way to grow your storage without growing your footprint.
Setup Idea #7: Adding Acoustic Panels to My Corner
The Problem I Didn’t Know I Had Until Video Calls
About 18 months into working remotely, a colleague finally told me: “You sound like you’re in a bathroom.”
My home office had bare walls, a wood floor, and a high ceiling. Sound was bouncing everywhere.
I added four 12″x12″ acoustic foam panels to the wall behind my monitor and two flanking the side walls of my desk. The impact on video calls was staggering.
Acoustic Panels vs Soundproofing — What’s the Difference?
This trips people up.
Acoustic panels absorb echo and reverberation inside the room. They make your voice sound clearer on calls.
Soundproofing blocks sound from entering or leaving the room. That’s a far bigger — and pricier — undertaking.
For most remote workers, acoustic panels are all you need. They greatly improve call quality without any construction work.
Setup Idea #8: Going All-In on a Single USB-C Hub Dock
One Cable to Rule Them All
Before this, my laptop had four separate things plugged into it at all times: power, monitor cable, USB hub, and ethernet. Moving between desk and couch meant unplugging and replugging four things every single time.
I switched to a single Thunderbolt USB-C dock. Now I have one cable. One plug into my laptop connects everything — two monitors, ethernet, USB-A ports for peripherals, and power delivery.
What to Look for in a USB-C Dock
Not all hubs are the same. Check for:
- Power delivery: Will it charge your laptop fast enough? Look for 65W or higher for most MacBooks and Windows laptops.
- Display support: Does it support the number of monitors you need? Some hubs only drive a single external display.
- Data ports: USB-A ports for older peripherals, plus USB-C for newer ones.
- Ethernet: A wired internet connection is always more stable than WiFi for video calls and large file transfers.
This is genuinely one of the most practical upgrades in my entire remote desk life setup journey, especially for laptop users.
Setup Idea #9: Creating a Dedicated Deep Work Zone
The Invisible Upgrade That Cost Almost Nothing
This was the strangest one because it wasn’t a product at all. It was a habit tied to a physical space.
I rearranged my desk so that one corner — left side, with nothing on it except my keyboard, mouse, and a single notebook — became my “deep work zone.” No secondary screen. No phone. No snacks.
When I sit in that position, my brain knows it’s time to focus. It’s become a physical cue.
The Psychology Behind It
This is called environment design. The premise is that your physical surroundings send signals to your brain. A cluttered space signals scattered thinking. A clean, minimal space signals focus.
The “deep work zone” concept is inspired by Cal Newport’s work, which emphasizes protecting long, uninterrupted blocks of focused time. Giving that time a physical home — a specific corner of your desk — makes it much easier to slip into that mental state.
You can create this even in a small apartment. The cost is zero. It just takes intention.

The Real Cost of a Great Remote Desk Life Setup
One of the biggest myths about home office setups is that they have to be expensive. Let me break that down.
| Priority Level | What to Buy First | Estimated Cost |
|---|---|---|
| Day 1 essentials | Good chair + desk lamp | $200–$400 |
| Week 1 wins | Cable management + monitor riser | $40–$80 |
| Month 1 upgrades | Pegboard + acoustic panels | $60–$120 |
| Long-term investments | Motorized desk + USB dock | $400–$700 |
Start with the chair. It impacts your health every single day. Work your way up from there.
What I Wish I Knew Before Getting Started
Reflecting on all nine setups, here are the lessons I’d share with my past self:
Don’t buy everything at once. Each upgrade changes how you use the space. Add one thing at a time, live with it for two to four weeks, then decide what’s next.
Lighting matters more than you think. It’s the first thing people notice on video calls, and it affects how you feel all day.
The “perfect setup” doesn’t exist. Your needs change. Your work changes. A good remote desk life setup is one that you keep adjusting.
Cheap gear has its place. You don’t need a $500 microphone or a $1,500 chair to do great work. But don’t skimp on your chair. It’s the one thing touching your body for eight hours a day.
Frequently Asked Questions
Q: What is the most important part of a remote desk life setup?
The ergonomic chair is the single most impactful investment for most people. You sit in it for hours every day. A poor chair causes neck, back, and shoulder problems that compound over time. Everything else is secondary.
Q: How do I set up a home office in a small room or studio apartment?
Go vertical. Use wall-mounted shelves, a pegboard, and a monitor arm to reclaim desk space. A compact corner desk works well in small rooms. A portable desk riser means you can fold everything away at the end of the day.
Q: Do I need two monitors to work from home?
Not necessarily, but most people who try dual monitors don’t look back. It’s particularly useful if your work involves consulting one document while working in another — coding, writing, design, or finance work, for example.
Q: How much should I spend on a home office setup?
If you prioritize well, you can put together a very functional remote desk life setup for $300–$500. Spend the most on your chair and lighting. The rest can be built up over time.
Q: Do standing desks really work?
Yes — but only if you alternate between sitting and standing. Standing all day is just as bad as sitting all day. The benefit comes from changing positions regularly. A cheap desktop riser is a low-risk way to try it before committing to a full sit-stand desk.
Q: What’s the best lighting setup for video calls?
A ring light or a softbox light positioned slightly above and in front of your face works well. Avoid having a bright window directly behind you — it turns you into a silhouette on camera. Bias lighting behind your monitor also helps reduce eye strain between calls.
Q: How do I reduce echo on video calls at home?
Soft surfaces absorb sound. Acoustic panels, rugs, curtains, bookshelves full of books, and even a couch or cushions all help. Acoustic foam panels are the targeted solution, but you’d be surprised how much a thick rug helps in a room with hard floors.
Q: Is a USB-C hub worth buying for a laptop home office?
Absolutely. If you use a laptop as your main machine, a USB-C dock is a game-changer. One cable connects your laptop to everything on your desk. It saves time, reduces cable mess, and usually includes ethernet — which gives you a more stable connection than WiFi.
Bringing It All Together
The ideal remote desk life setup isn’t built in a single weekend shopping spree. It’s built one smart decision at a time.
Each of the nine ideas I tried here addressed a real problem. Some were cheap fixes. Some took more investment. All of them made my workday noticeably better.
Start with what bothers you most right now. Back pain? Chair first. Eye strain? Sort the lighting. Cluttered desk? Cable management and a pegboard.
Your workspace is your tool. Keep tuning it.