
Meta Description: Remote desk life desk layouts for changing the way you work from home. Here are 5 smart setups that cut down on clutter and fatigue so you get more done every day.
5 Clever Work From Home Desk Layouts That Will Increase Your Productivity
Working from home sounds lovely — until you realize the kitchen table isn’t doing it anymore.
If you’re sitting at your desk for 6, 8, or even 10 hours a day, the way you have your workspace set up is more important than many people realize. A messy, uncomfortable, or poorly organized desk doesn’t just look bad. It saps your focus, hurts your body, and makes each task harder than it has to be.
The good news? You don’t need a ton of cash or a giant space to solve this.
In this guide, get 5 smart remote desk life desk layouts that do work. Each one is designed to help you focus, protect your posture, and make the workday feel less like a slog. Whether you’re a student, freelancer, or full-time remote employee, there’s a setup for you here.
Let’s make your dream workspace — one layout at a time.
Why the Layout of Your Desk Matters More Than You Realize
Most people focus on what they put on their desk. A new monitor. A better keyboard. A fancy lamp. But the truth is, how you arrange those things makes just as much of a difference.
A well-designed remote desk life desk layout should serve you in 3 key ways:
An organized environment helps your brain work better. When everything has a home, you aren’t wasting mental energy on where things go — and you save more of it for actual work. That’s called “cognitive load reduction,” and it’s a real thing.
Your body lasts longer too. Poor desk setups rank as one of the leading factors behind neck pain, back pain, and eye strain among remote workers. A smart layout positions your monitor at eye level, your keyboard at elbow height, and your most-used tools within arm’s reach.
Lastly, the right layout encourages you to get into “work mode” much quicker. If your desk looks like a workspace, your brain will feel like it’s at an office — even if you’re still in your pajamas.
What Makes a “Smart” Desk Layout?
Before we dive into the five layouts, here’s a quick cheat sheet for what separates a smart desk from a messy one. Keep these six elements in mind as you look through each layout below. The best remote desk life desk layouts tick most of these boxes.
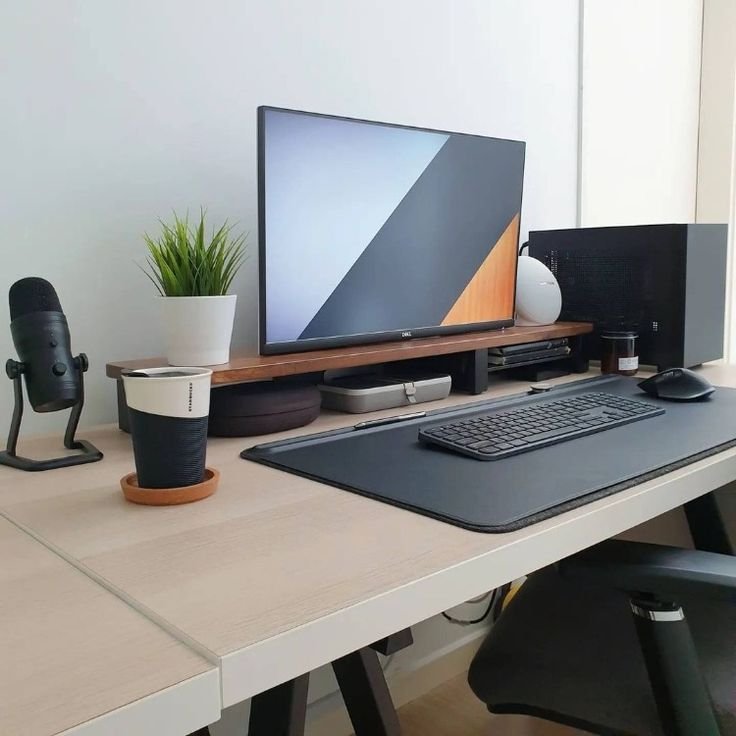
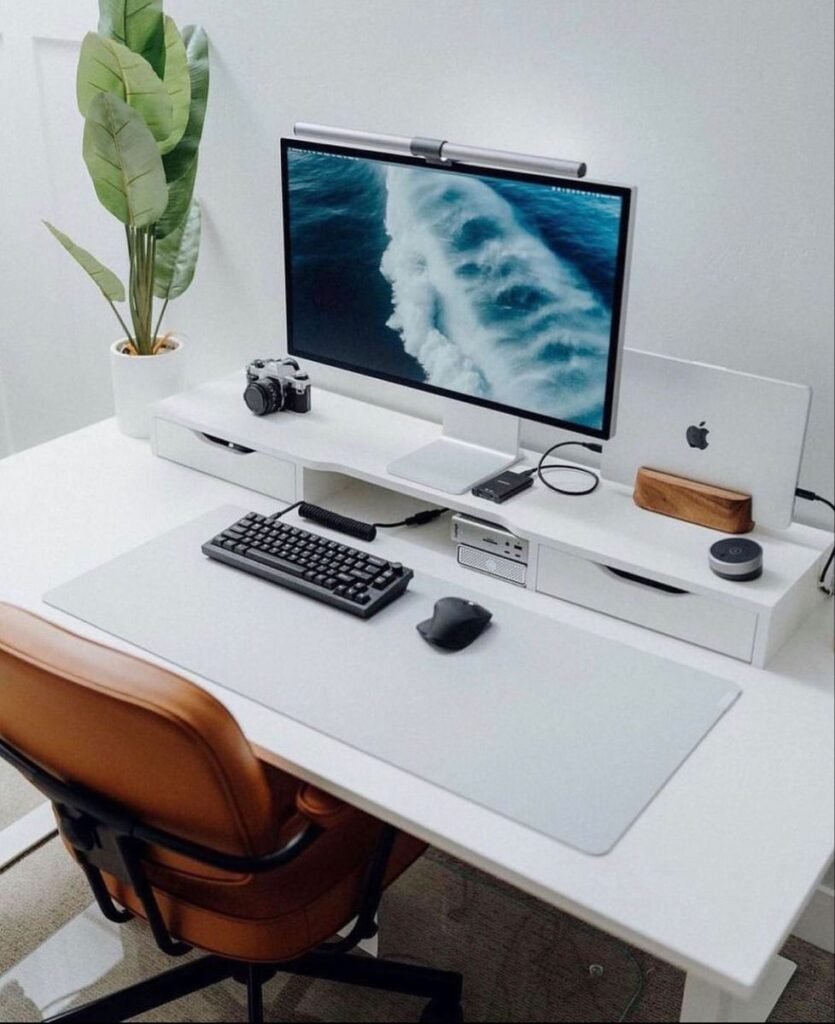
Layout 1: The Minimalist Setup — Less is More
Who It’s For
This setup works best for writers, coders, students, and anyone who needs intense, distraction-free focus. If your work is largely done with one screen and a keyboard, this is your layout.
What the Setup Looks Like
The minimalist layout strips your desk down to the very basics. Here’s what stays and what goes:
What stays on the desk:
- Single monitor (or laptop on a stand)
- Keyboard and mouse
- A small notepad
- One pen or pencil
- A water bottle or mug — that’s all
What gets moved off the desk:
- Loose papers and documents → into a drawer or folder
- Chargers → secured under the desk or in a cable box
- Decorations → down to one or two pieces max
- Extra gadgets → only brought out when necessary
Why It Works
When your eyes fall on a clean surface, your brain doesn’t have to decide what to pay attention to. There’s only one thing in front of you — your work.
Research on workspace design is clear: visual clutter elevates cortisol — the stress hormone. More stuff on your desk literally makes your brain more anxious.
The minimalist remote desk life desk layout removes that tension altogether.
Quick Setup Tips
Position your monitor directly in front of you, about an arm’s length away. The top of the screen should be at or just below eye level. Sit with your feet flat on the floor, and keep your elbows at about 90 degrees when typing.
If you’re using a laptop, invest in a laptop riser stand. It’s one of the best $20–$40 purchases a remote worker can make.
Layout 2: The Dual-Monitor Desk — More Screen, More Output
Who It’s For
Designers, video editors, stock traders, data analysts, project managers, and anyone who constantly bounces between tabs, apps, or documents. If you find yourself alt-tabbing every 30 seconds, two monitors will change your life.
What the Setup Looks Like
A great dual-monitor remote desk life desk layout isn’t just about placing two screens on your desk. It’s about positioning them correctly.
Standard side-by-side setup:
- Primary monitor directly in front of you
- Secondary monitor slightly to the left or right at a 30-degree angle
- Both screens at the same height (use a monitor arm or stand to match levels)
Stacked vertical setup (if your desk is narrow):
- Primary screen at eye level
- Secondary screen above it for reference content, Slack, or email
- A monitor arm mount that allows stacking
Why It Works
A dual-monitor setup eliminates the time wasted switching back and forth between applications. According to research by Jon Peddie Research, dual monitors can boost productivity by up to 42% for certain tasks. That’s not a small number.
Rather than losing your train of thought every time you flip between apps, both windows sit side by side. You stay in your flow state longer.
Watch Out For These Mistakes
Most people set up two monitors and then complain about neck pain. The reason? They placed both screens to one side, forcing their head to stay turned for hours.
Always put your primary screen dead center. The secondary monitor goes to the side you look at less.
Make sure, too, that both screens are calibrated to the same brightness and color temperature. Two screens with very different brightness levels cause eye fatigue quickly.
Layout 3: The L-Shaped Layout — Built for Multi-Tasking Warriors
Who It’s For
Entrepreneurs running multiple projects, executives handling calls and documents, teachers managing lesson prep and virtual classrooms, and freelancers juggling client work and admin tasks.
The L-shaped layout is the remote desk life desk layout that gives you true elbow room.
What the Setup Looks Like
An L-shaped desk (or two desks arranged in an “L”) creates two distinct work zones:
Zone A — Primary Work Zone (the main arm):
- Your monitor(s)
- Keyboard and mouse
- Microphone, if you’re frequently on calls
- Webcam
Zone B — Secondary Work Zone (the side arm):
- Notebook, planner, or sketchpad
- Reference materials or second laptop
- Printer, if you use one
- Paperwork in progress
The magic of this setup is the pivot. You spin in your chair 90 degrees to switch tasks. Physically moving your body between zones also helps your brain shift modes.
Why It Works
This layout is deeply rooted in something called “task batching.” When your desk literally has two separate zones, you naturally categorize your work. Writing goes here. Admin goes there. Design work goes here.
That physical separation mirrors a mental one. It helps you finish one type of task before starting another — and that’s one of the most effective productivity habits out there.
Desk Size Considerations
You don’t need a large room for an L-shaped layout. Most compact L-shaped desks start at around 47–55 inches per arm. That’s very manageable in a spare bedroom or corner of a living room.
When placing it, put the corner of the “L” into the corner of the room. This frees up the rest of the space and positions your back against the wall — something many people subconsciously find calming.
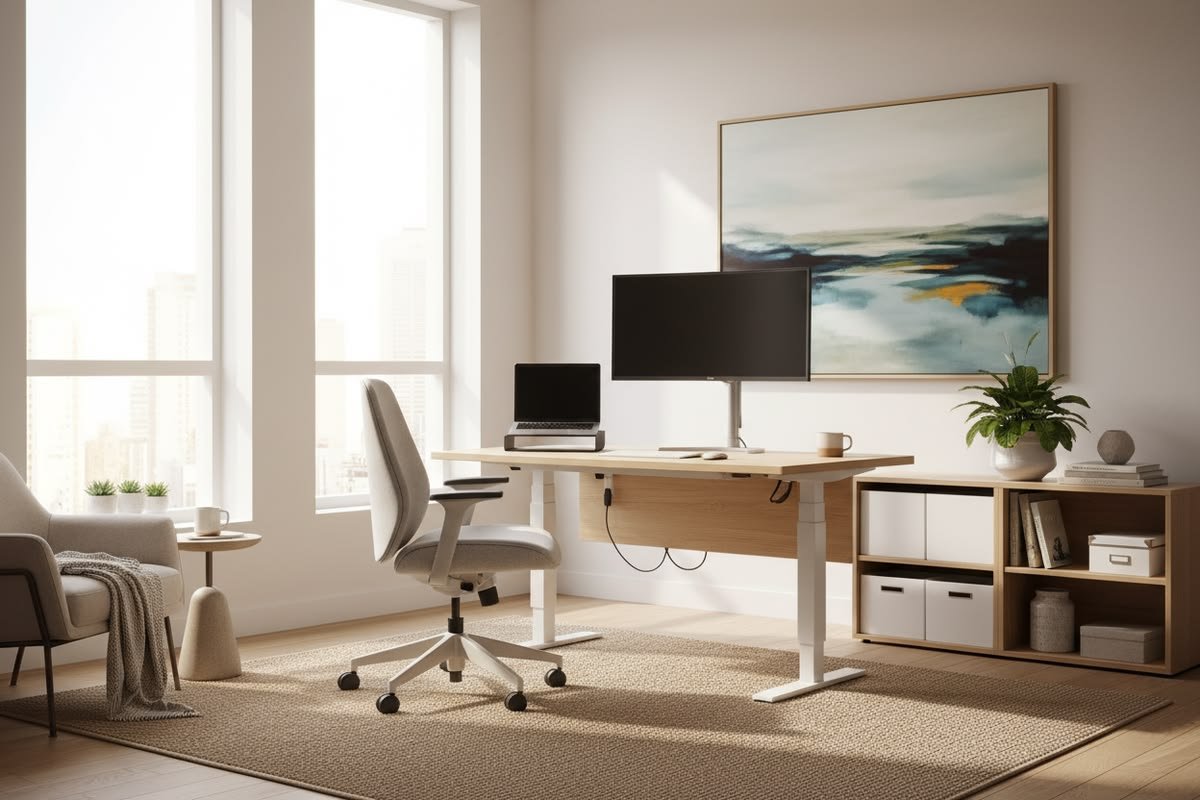
Layout 4: The Standing Desk Layout — Move More, Crash Less
Who It’s For
Anyone who feels sluggish after lunch, has lower back pain, struggles to stay alert in the afternoon, or wants a healthier work setup. This one is especially great for those who exercise regularly or care about their physical health.
What the Setup Looks Like
A sit-stand desk — also known as a height-adjustable desk — lets you alternate between sitting and standing throughout the day. The remote desk life desk layout for a standing desk is fairly similar to the minimalist setup, but with movement built in.
Core equipment:
- Height-adjustable desk (electric is easiest, crank-style is cheaper)
- Anti-fatigue mat (non-negotiable if you’ll be standing for stretches)
- Monitor arm for quick screen height adjustments
- Cable management system that moves with the desk
The Sit-Stand Ratio That Actually Works
Most ergonomics experts recommend a ratio of around 1:1 or 2:1 sitting to standing — meaning you stand for roughly 30–50% of your workday.
Here’s a simple schedule to follow:
| Time Block | Position |
|---|---|
| 9:00 AM – 10:30 AM | Sitting |
| 10:30 AM – 11:30 AM | Standing |
| 11:30 AM – 1:00 PM | Sitting |
| 1:00 PM – 2:00 PM | Standing |
| 2:00 PM – 3:30 PM | Sitting |
| 3:30 PM – 4:30 PM | Standing |
| 4:30 PM – 5:00 PM | Sitting (wrap-up) |
You don’t have to follow this exactly. The point is to never sit for more than 90 minutes straight.
Why It Works
Sitting all day slows blood flow. That leads to mental fog, back pain, and energy crashes — especially around 2–3 PM.
Standing periodically keeps your circulation going, burns slightly more calories, and has been linked to better mood and alertness. Many remote workers who switch to standing desks report fewer afternoon slumps and better energy levels overall.
The key is the anti-fatigue mat. Standing on a hard floor for hours hurts — but a quality cushioned mat makes an enormous difference. For a deeper look at how remote workers are optimizing their health and setup, Remote Desk Life covers everything from ergonomics to gear reviews in one place.
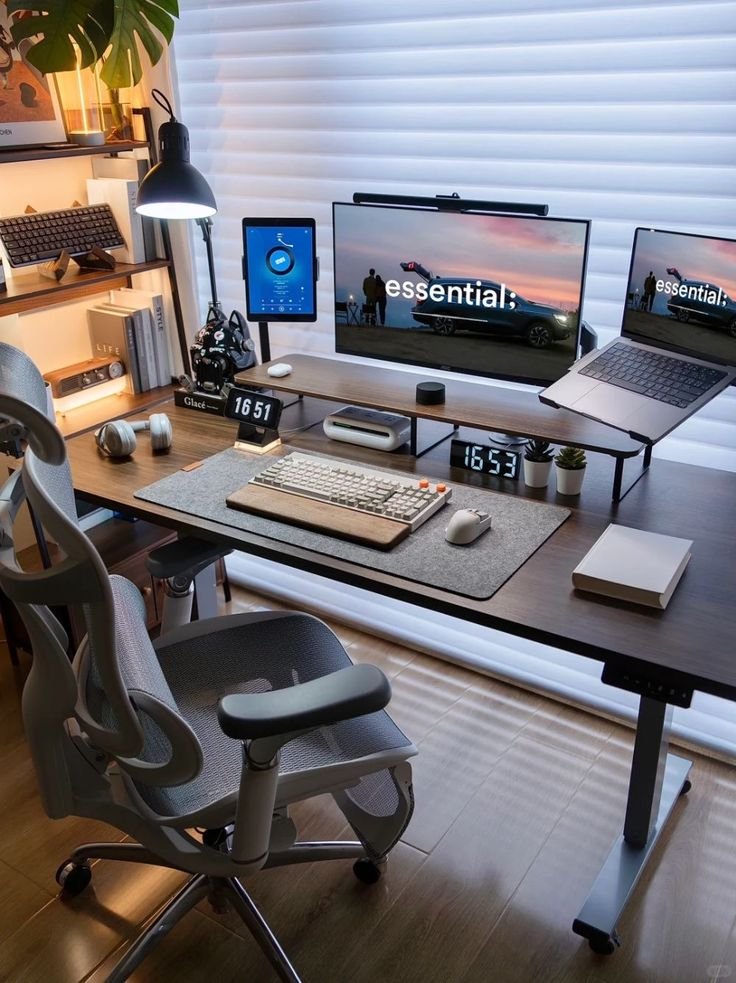
Layout 5: The Command Center — Total Workspace Control
Who It’s For
Power users. Streamers, content creators, project managers coordinating large teams, engineers monitoring multiple systems, or anyone who needs a lot of information visible at once. This is the most ambitious remote desk life desk layout on this list.
What the Setup Looks Like
The command center takes up more space than the others, but every inch is intentional.
Main display row:
- Three monitors (or two ultrawide monitors side by side)
- Central monitor = primary work screen
- Left monitor = communication (Slack, email, calendar)
- Right monitor = dashboards, monitoring tools, reference docs
Secondary equipment:
- Dedicated webcam + ring light for video calls
- Stream deck or programmable keypad (shortcuts for everything)
- High-quality microphone on a boom arm
- Headphone stand within reach
- USB hub for all peripherals
Desk surface organization:
- Only keyboard, mouse, and writing pad on the surface
- Everything else mounted, hung, or stored underneath
- Cable management tray under the desk
- Monitor arm setup to float all screens off the surface
The “Three Zone” Philosophy
The command center works because it follows a strict three-zone rule:
Zone 1 — Focus Zone (center): Where your deep, primary work happens.
Zone 2 — Communication Zone (left): Messages, emails, and calls. You check it intentionally — not constantly.
Zone 3 — Reference Zone (right): Data, dashboards, or documents you need to glance at but not interact with deeply.
Keeping these zones separate prevents your communication tools from bleeding into your focus work. That bleed-over is one of the biggest productivity killers in remote work.
One Big Warning
More screens do not automatically mean more productivity. The command center only works if you’re disciplined about what goes on each screen. If all three monitors end up showing YouTube, social media, and memes — you haven’t built a command center. You’ve built a distraction machine.
Use this layout only if your work genuinely requires monitoring multiple things at once.
Quick Comparison of All 5 Layouts
| Layout | Best For | Space Needed | Estimated Cost | Top Benefit |
|---|---|---|---|---|
| Minimalist | Writers, coders, students | Very small | $50–$200 | Maximum focus |
| Dual-Monitor | Designers, analysts, PMs | Medium | $150–$500 | Eliminates tab switching |
| L-Shaped | Multi-taskers, entrepreneurs | Medium-large | $200–$600 | Clear task separation |
| Standing Desk | Health-conscious workers | Small-medium | $300–$800 | Reduces fatigue |
| Command Center | Power users, creators | Large | $800–$2,500+ | Total workflow control |
The Golden Rules of Any Remote Work Desk Layout
These rules apply to every one of these remote desk life desk layouts, regardless of which you choose.
Rule 1: Your monitor never sits flat on the desk surface. Use a stand or a monitor arm. A monitor sitting directly on a desk is almost always at the wrong height.
Rule 2: Your most-used tools are closest to you. Your keyboard, mouse, and notepad should be within easy reach. Rarely used items go in drawers or off the desk entirely.
Rule 3: Cables are managed, not ignored. Use velcro straps, cable clips, or a cable management tray. Tangled cables are a visual distraction and a physical hazard.
Rule 4: Lighting comes from the side, not behind your screen. A window directly behind your monitor creates glare. Natural light from the side is ideal. Add a bias light behind your monitor to reduce eye strain during long sessions.
Rule 5: Your desk is a workspace, not a storage unit. If you’re keeping things on your desk “just in case,” they don’t belong there. Clear surfaces make clear minds.
Small Upgrades That Make Every Layout Better
You don’t need to spend a fortune to improve your setup. Here are a few affordable upgrades that work with every layout on this list:
A monitor riser or laptop stand costs $20–$50 and instantly fixes your screen height. This one change alone can eliminate neck pain for many remote workers.
A wireless keyboard and mouse removes cables from your primary work area. Wireless peripherals have come a long way — latency is no longer a concern for most users.
Desk plants — yes, really — have been shown to reduce stress and slightly improve air quality. A small succulent or pothos costs almost nothing and makes your space feel more human.
A good desk lamp with adjustable color temperature lets you switch between cool light (energizing, good for mornings) and warm light (relaxing, good for evenings). This helps your circadian rhythm and reduces eye strain. According to Harvard Health Publishing, exposure to the wrong light at the wrong time can disrupt sleep and focus — another reason to get your lighting right.
Frequently Asked Questions About Remote Desk Life Desk Layouts
Q: What is the most efficient desk layout for remote work? A: It depends on your job. The minimalist layout works best for writers and coders. Multi-taskers love the L-shaped setup. The command center tends to attract power users and content creators. There’s no single “best” — just what works best for your workflow.
Q: How much space do I need for a proper home office desk setup? A: A solid minimalist or dual-monitor setup requires as little as a 6×8 foot corner of a room. L-shaped desks and command centers require more like a 10×10 area. Always measure before you buy.
Q: Do I actually need a standing desk? A: Not necessarily — although if you’re sedentary for more than six hours a day, it’s something to consider. Many remote workers report that standing for as little as 30–60 minutes a day helps tremendously with afternoon fatigue. Budget options start around $150–$200.
Q: How do I reduce cable clutter on my desk? A: Start with velcro cable ties (around $5 for a pack). Route cables behind the desk or down a desk leg. Add a cable management tray underneath the desk for power strips and excess cord length. A USB hub also consolidates connections into one cable from your computer.
Q: Is a two-monitor setup worth it for general work? A: For most people who work digitally, yes. The productivity gain from not constantly switching windows is real. Even a basic second monitor ($100–$150 used) can make a noticeable difference.
Q: What should I keep on my desk? A: Apply the “daily use” rule — if you don’t use it every day, it doesn’t belong on the desk surface. That typically means: monitor, keyboard, mouse, notepad, pen, water, and maybe a lamp or small plant.
Q: How do I make my home desk look more professional for video calls? A: Position your webcam at eye level (not below), make sure light is coming from in front of you (not behind), and tidy up the area visible in your background. A simple bookshelf or neutral wall works perfectly. You don’t need an expensive backdrop.
Wrapping It Up — Build the Desk That Works for You
Your desk is more than just a piece of furniture. It’s the environment where you think, create, communicate, and earn. That makes it worth getting right.
This guide covers all five remote desk life desk layouts — from the minimalist who needs calm and clarity to the power user juggling a dozen things at once. Every single one serves a clear purpose, and every single one can genuinely change how your workday feels.
Start with the layout that matches your current way of working. You don’t have to go all in at once. Even one or two small changes — clearing your desk surface, raising your monitor, adding a second screen — can make your next workday noticeably better.
Your best work starts at a desk that’s built for it. Now go set yours up.